
Do you have standing water, swampy spots, or washout areas in your garden? Save money and fix it yourself! In this video our Grounds and Research Supervisor Jeremy Schmidt teaches the basics of managing water flow and preventing erosion in your garden.
The first thing Jeremy discusses is what causes erosion and standing water. You will learn how to measure your soil grade using simple, inexpensive tools, and which easy landscape modifications help your plants stay healthy and happy regardless of moisture extremes.
Next Jeremy demonstrates how to install a simple and effective drain box system. The components are very easy to assemble and are available at most box stores. He talks about the different materials used for the water features in the Juniper Level Botanical Garden: pipes, lines, pumps, etc.
After the demonstration, Jeremy walks though the gardens while discussing tips and best practices for creating a water feature, such as an artificial pond, waterfall, or a creek.
Gardening Unplugged is our series of free discussions provided at our Open Nursery and Garden Days.
Supplies and Equipment:
- Drain Basin & Grate
- 1-inch Level
- String
- String Level
- 4-inch Corrugated Drain Pipe
- 45-Mil Pond Liner
- 2-inch or greater flex pipe
- 110 volt recirculation pump
Video Transcription
All right. Well, today we're going to talk about gardening with water and I’m assuming that most people, if they garden, do have to garden with water, whether they want to or not. So, we're going to look at it both extremes. Both gardening when it's dry gardening, when it's really wet, how to deal with the water that you have from storms. And then also if you want to put in a water feature. Just some of the very basics about water features.
So, let's start with too much water. So, have any of you ever dealt with too much water?
Okay you have. What do you do?
Dig a trench.
Dig a trench, Okay. That's certainly one option is get it below ground, get it below grade. We do that all over we have a whole network of drain boxes around the property that drop into small ponds, depressions, that hold water for a while and let it diffuse back into the ground. That's... we would prefer that our storm water does not leave the property, if at all possible. We like to get that storm water back into the ground directly below us if we can. So, I can show you a little later on, we'll follow this path. This is the first drain in the system. We'll follow it to see where it goes.
Volume Plus Velocity Equals Erosion
But when it comes to actually getting the water to go into a catch basin, into a trench, anywhere, one of the great things about water is that it likes to flow downhill. We can generally assume that the challenge is to get it to flow downhill in a way that does not cut, in a way that does not puddle. And so, we want to, we need to work on our grading so that the water that we have flattens out over an area as it moves. Erosion, caused by water, happens from two things together: it's volume plus velocity. You take those two things and put them together and you get cutting. If you remove either one of those or enough of both, then you will get no cutting. So, if the volume isn't there, in other words, you've got a lot of drain boxes or you've spread the water out enough so that every square inch of ground simply isn't moving that much water then you will reduce or eliminate erosion. If you slow the water down, in other words, your slopes not like this now it's more like that, then you will reduce or eliminate erosion. A little of both, a lot of both, remove one altogether if you're able to do that. So, if you remove the water all together then you don't have cutting from water and if you stop the water altogether, you'll have a puddle, but you won't have erosion. So usually, it's a combination of those two things.
Use Drain Boxes to Prevent Pooling
So, let's start with putting in a drain box. I’m not going to go through and dig everything, but you can find these at big box stores generally have them irrigation and landscape supply places. Site One is a big one around here. They'll generally have these boxes. They're going to run you about 70, 80 dollars per unit. When you open it up, you're going to have a box, you're going to have a grate, and you're going to have something that water can go into... like this. There are... you can buy a piece that has a six-inch opening instead of a four-inch opening if you need to move more water. Really all you do with these, you don't need many tools for this, there's little slots there, there's slots there, and they should line up and you twist it like that. And that's on there for the most part. It's not watertight, it doesn't have to be. And then on the other side, if you're not running through, if it's not a middle box. Well, if it is, you can either put another one of these on, so water goes through one comes out the other. Or if it's what I call an origin box it's the first in the system or it's the only one in the system then you put these little plates on. And again, just little knobs will line up and that's pretty much all there is to it. And from there, once it's in the ground and you've got your trench dug to it.
Once you put your top on... there you go. It's best to get a little one of these little 1-foot levels and you want to make sure that your box is level on top. If it's not level, it's not going to be able to capture as much water as it can if it's level, that's important. The other thing to keep in mind with these is the maintenance of them. So over time when the water flows in there and it's doing its job, you'll get sediment that falls in there as well. It might cover the top in which case you need to uncover the top. But when it falls in there if you notice the bottom of this catch basin is deeper than its outlet. You have a couple inches in the bottom. What that allows you to do is regularly maintain these boxes by eliminating the sediment that's in the bottom. Just get a shovel get a couple shovelfuls out it doesn't have to be pretty. But once the sediment gets into here and hits this level it goes into your pipe. Believe me, it is much easier to keep this clean than it is to dig up your pipe find the clog and replace your pipe. So that's something that we do here we have over 100 drain boxes on the property and every time we get a big rain, we've got to do what we've got to do. But that prevents our paths from cutting. It prevents pooling of water. It allows events like this to happen where people can walk through the garden without needing waders to do so. It helps keep our plants alive because if areas get too wet plants die. So that's that.
Determine the Grade of Your Garden to Move Water
The other part of this is the pipe that you have in the ground. In order for water to move through, it needs to be level to down. So, what I’ve done is... this is how we can determine that. When you're digging a trench, you have a string line with what's called a string level over the top of it. And you want the string to be level you want the string level to be level. Then all you do to figure out if you have drop is every few feet you just put a tape measure straight down like this and make sure that you're either not going up or you're going down. But you can pretty easily achieve that. A string level and a string line will also let you... you know you can run 2-300 feet of string at once and get a big area that... you know even me looking out i can't, I can't tell if there's a slight dip. I can't tell if there's a slight grade. So, what this allows me to do is find a big puddle or a future puddle and see that this this area is a small depression, it's about one inch lower, two inches lower as a cross section as I walk through. So that allows me then to add soil, add compost, add gravel, whatever it is that I need to add so that I don't have a puddle. This might also say well I need to I need to cut some of this over here to allow the water to escape. So, I can't necessarily fill here, but I can cut here. So again, it's all about, it’s cutting and filling. It's a combination or maybe it's all of one but that is what allows us to have grade for surface runoff or grade to move water wherever we want it to move to. And so, string levels you can buy these at any big box store, hardware store and they're a couple of bucks a piece. They're real handy. They're real easy to lose but they're not too expensive. But that'll let you see those slight differences in grade that you can't see with just your eye. And again, you can set that up over the pipe that you're putting in the ground so that you can know that you don't have any rises in it or big dips in it. So great little tool. Again, this whole setup this is only five or ten bucks’ worth of materials and this will put you on the same plane as the professionals who would come out and do the same thing.
Here's our pipe. So, this is a 4-inch corrugated drainpipe. If you buy this at a store it comes in rolls, usually 50 feet or 100 feet. It's very flexible. If you jump up and down on it, you'll crush it. It's not necessarily always watertight but that's okay with drainage. And again, we've got our thing set up here. Let's say this was in the ground, got your thing in the trench, that's all there is to it, really. That's it. If you need to cut this, just use a box knife and it cuts very easily. Watch your fingers, these things get out of control. But just put it in there and move it through. Once it gets cutting, it wants to really cut fast so again watch your fingers.
That's all there is to that.
Raise Beds to Improve Drainage
Other things you might want to consider when gardening. Too much water, again, your ground is always wet. So, things like French drains which is essentially the same setup but with a pipe that has holes in it already. Gravel, water goes into the gravel drain trench or it comes up from below and goes into the drain trench gets into the pipes got a fast route out of there. That's a pretty common thing a lot of internet resources about French drains about drain boxes. Plenty of YouTube videos to show how to set them up as well. Another thing to consider though when gardening where you've got a lot of water is raising your beds. And that's what we do all around us is almost every bed on this property is raised above grade. And so that ensures even if the ground is totally saturated from one of those well maybe a hurricane coming up who knows uh that there's always space where the roots grow of our plants there's always space for that soil to drain regardless of how wet it is outside. And so raised beds, another great way to garden with too much water. However, one thing I like about raised beds is it creates more of what I call root run for the plants. Because roots grow in response to air and water a mixture of the two, they know that they have that they don't know anything their plants generally, but they have that. They have whatever carbureted mix of air and water they need to grow good roots. They can get their roots deeper because the berm is this tall there is no compaction and there is no standing water down at least however far you have your berm. Therefore, the roots can grow deeper. And in a time of drought the roots are deeper in a time of extreme rain there's drainage so really berm gardening, raising your beds regardless of what your soil is that you have to deal with that's a big plus for gardening. It's going to buffer extremes in moisture. It also gives the water somewhere to soak in so wherever you have a berm you're not going to have generally not going to have a water problem with being too wet for sinking in or anything like that.
So that's one little tidbit about it being too dry. Raise your beds up.
Build a Water Feature Yourself and Save Money
Maybe you want to put in a water feature, and you want to display water. You want to imprison water and make it do what you want it to do. Here we have several creeks that recirculate water. Now we have a couple of ponds that hold water, and we use a 45-mil pond liner. It's rubber it's actually pretty heavy, feel free to feel this and look at it. We don't use anything but 45-mil it's just a waste of money if you go any thinner than that. There's always a piece of gravel or a deer hoof or something that wants to puncture your liner. It is much easier to pay more and get the thickest liner that you can than it is to try to go back and patch it with tape and glue stuff and it's never going to be the same. So, use very thick liner, 45 mil at least. It's definitely worth the extra money up front. But we put it down and curve up the edges. Generally, if you want a one- or two-foot-wide channel of flowing water you're going to need at least a seven- or eight-foot-wide piece of liner. One of the mistakes that I see a lot of gardeners make is they don't drop down into the ground and give themselves enough depressed width in order to hide the liner. Whether that be in a flowing water situation often the fountainhead where the water comes out of the top of the pipe to begin its descent. Often in gardens, and even the ones that are installed by people who charge a lot of money to do it, they make something what I call a Moses rock. So, you've got a flat lot like this and all of a sudden, you've got a pile of rocks and water is coming out the top of it. I've never seen that happen in nature outside of the bible. I guess if you take a stick and you beat a rock enough with it then biblically water should come out of it but that's not really how it generally works in our garden or in nature. And so, we want to this is something to keep in mind as you place your pipes in your liners give yourself enough drop so that you can bring that liner up and hide it with rocks with garden plants and that it doesn't it doesn't work against your grade. It doesn't look awkward like there's a volcano of water in your yard or something. Thick liner.
Your recirculation pipe, that's the other part of it. So, water's coming out the top it's going down your liner all done. You've got a nice basin you've got some koi in there, awesome. You've got a pump in there somewhere and there's a lot of different kinds of pumps. Don't sweat it. You're just going to need to do a little bit of research up front. How many gallons per minute is your pump. Consider a pump curve. So, every foot that a pump has to pump water uphill is working against the pump. There's weight literally pushing against the impellers and every pump has a has a point where it essentially zeros out. And so, you're going to want to find something called a pump curve. It's just a couple of curved lines on a chart. You just want to find a pump that for the amount of rise that you're forcing it to push that water uphill, it can easily do so. You might have a 50-gallon a minute pump but if you have to move that water uphill 20 feet, or if you have to move it through pipe that is too narrow, by the time you get to the top you've just got a trickle. So, I generally suggest that if your pump plugs into a normal outlet, a 110-volt pump, the same outlet that you plug a lamp into or a hair dryer into, I generally wouldn't use anything less than a 2-inch pipe to recirculate the water. And even that might be pushing it. You don't want any resistance against the pump more than the weight of the water itself. So, no 90-degree angles, no crimps in the pipe. The best kind of pipe that you can use is a flexible pipe. It gets a little expensive when you get to 2 inches. A 3-inch pipe for this kind is very expensive but it's quite available you can buy it on online or big box stores will have it at a ridiculous markup. But these are pretty... this this glues just like normal PVC pipe and this can handle about 30 gallons a minute.
Most of the... you can buy the little pond pumps at the big box stores. I like to get them online. These days the Chinese-made pond pumps are so inexpensive and they'll still last about three years, I’ve found. And so, they'll pump continuous use for about three years and that's the route that I go. So, a pump that will move about 30 gallons a minute uphill about 10 feet through a two-inch pipe is going to cost you about hundred 130 to 140 bucks and you just plug it in.
So, another thing to consider when you have a recirculating feature, before you build it, consider talking to an electrician or sighting where you want the recirculation pump and the basin to be consider putting it near an outlet or bring an outlet near it. That's one of those infrastructural things if all you have to do is go right up next to the pond and plug the thing in then that's going to that's going to simplify it a lot for you. So, let's see. I'll tell you what let's do a little bit of a walk around the garden and I'll show you some of our gardening with water in action.
As you can see, we've got raised beds all around you. Irrigation heads coming out of many of those beds since we have a lot of roots in the ground, we need to make sure that they stay moist.
Here's another drain box in the garden. Again, you can see it drains about 30 feet of path that way, 30 feet of path that way, a couple feet this way. And so, it's got maybe a hundred square feet that it drains and that's pushing it for a drain box this size. It's always best to put more in than you think because there's always that North Carolina rain that's going to come through and really show us that we may have under planned.
Okay well let's walk towards the sound of the waterfall.
The Bigger the Water Feature, the Bigger the Pump
So, what we have here is a waterfall that recirculates from all the way over there which we'll take a look at in a minute. This is a little bit bigger pump. So, the pump that moves this water is about one horsepower. It is a 220- or 230-volt pump so it needs a little bit more electricity than a normal power outlet can give it. This is one where it's easy enough to build the system and the basins that you need on your own, but you'll probably want an electrician to wire the pump. So, it starts here, this is about 90 gallons a minute. It is pumped up about 20 feet through 3-inch pipe. You couldn't do this with 2-inch pipe. 90 gallons a minute is going to be rolling at least 10 feet a second through 2-inch pipe and that's just not going to happen without a whole lot of back pressure. The 3-inch pipe handles it. This is a pretty big waterfall.
Last winter, we redid the creek. Yes, and you'll see here we've got rocks. There is a liner under here which we don't want you to see. Tony Avent's policy is absolutely no liner ever should be showing, period. That is a non-starter. So, what we made sure of is that there's no reason to bring the rocks up too tall. We wanted it to look like the soil had naturally eroded exposed rocks and it's now in its own little creek bed. But the liner is underneath this. When we had excess liner, we simply take that utility knife, and we trim it off and it just slices right through it no problem. That's the nice thing about liners is it ends up being whatever shape you want it to be. You just cut it with a knife.
All right, we'll continue this way.
Use Water to Make Noise
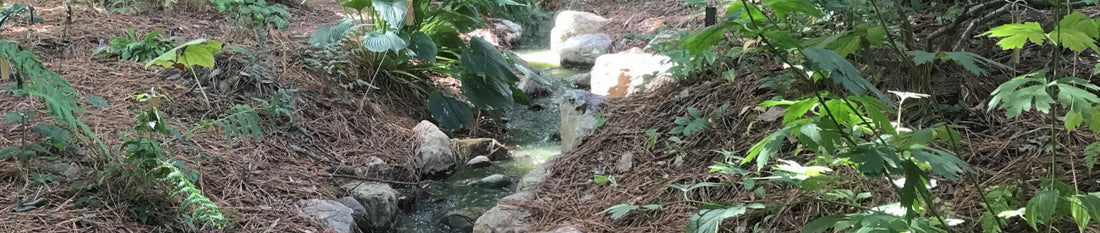
One thing that we like to do with water is make lots of noise with it. And so, the big waterfall up there makes lots of noise but anytime we can get the water to cavitate you get noise. And so, here's a great example a nice large flat stone here's a bridge that concentrates people and we've got almost as much noise here as we do over there. Another thing that you're not seeing and that's by that's intentional. There are there are pipes that empty into this creek from underneath this bridge. The bridge actually hides the pipes. Those pipes empty all of that storm water that we were putting in those basins. And so, this creek is not only here to move water look good make sound but it's also here to act as a low point to dump storm water into. And of course, if you do that it's got to still run off somewhere and so we'll head over to where all of the storm water runs off too.
Water Features Slow Water Down
Right, so all that water goes under the road, and it's exactly 40 feet because there are two 20-foot sections of galvanized pipe and I’m very familiar with them because I installed them, goes under here. It empties into here and goes around these wetlands full of iris and other plants that are able to take nutrients out of the water. They slow water down; it allows sediment to fall in a way that we can get it out of there. All of that water going around here then falls into this small pond. This pond is not lined. It does have some bentonite in it which is a clay product that you can put into a water basin, and it helps seal it helps slow the water from being able to circulate or percolate down through it. However, I took a track hoe a couple years ago with a 1-yard scoop on it, parked it in that gap, and took a whole bunch of sediment out of here so the bentonite layer has been intentionally compromised. But we're okay with that because that allows our storm water to drain out here. When we have a large rain, and we have hundreds of gallons of minute going into this creek beyond what's being recirculated that's got to go somewhere. And so, what happens is it fills this pond up all the while some of that water is draining back into the ground. But then when it hits a certain amount there's a second spillway there. And that spillway dumps it into another small pond over there which allows it to continue draining as fast as possible into the ground. And then sometimes we get a big storm, and we have a spillway that crosses under the deer fence there and it does at that point exit the property. But we're going to do everything we can to keep that water here as long as possible until we got to let it go. But that's one of those that's one of the joys that I have in gardening is when I have an opportunity to celebrate nature, even if it's not a plant, to be able to celebrate water and the way that it flows the way that it comes and goes. To manage it well so that it doesn't do damage to the garden but then to get to that level where you can manipulate it, celebrate it, keep it around a little longer and know that that storm water is actually percolated down into your groundwater in in a way that you know it doesn't have road sediment to you know all of the zinc and little bits of tire and everything else cigarette butts that come with going along a road it's it stays right here and it filters on through. So that's kind of the top of the system down to the bottom. At that end of the pond, we'll walk down there momentarily and look at where the pump sits.
So, something similar it's your garden might not look exactly like this setup. But we have our power source. We have in there there's a basin, a big plastic tub, the pump is deeper than the bottom of the pond around it so that the water can almost be drained out of here but there's still going to be a little bit of water left in that tub. However, we don't want that to happen. So, we also have here is a recirculation valve or rather a fill valve. So, this little float it's like a bobber when the water level gets low this kicks on and it refills the pond with our well water. And so, every little recirculation system is going to need some kind of a float valve something to refill itself when the water does drop.
And so that's about that's about it for the recirculation system. Does anyone have any questions about water in their garden?
All right.
The pump is out there about six or seven more feet from where you can see. It needs to go out there close to the middle because of the depth of the water. In home situations or in smaller situations, the pump can be right near an edge. But here, just because of the size of this and the purpose of it which is to catch some sediment it's out there a little bit further.
Well occasionally we need chest waders, and we'll go out there and pull the grass and the iris especially the iris we pull it back some. As far as aquatic weeds like duckweed and things like that we that's the purpose of the recirculation so when water recirculates enough, those kind of aquatic weeds, the floating kind are unable to grow.
Can I see fish?
Yeah, there's a couple of koi in here and then the little, tiny fish in there, those are native actually to right here in Wake county. Those are called mosquito fish. They eat ... yes mosquitoes, very good. They, mosquito fish, eat any kind of mosquito larva. Wonderful little native fish. They're related to guppies and so they give live birth. They don't spawn like most fish do. They actually pop out little baby fish.
And do other birds come and get your fish?
Not generally, no. I’ve seen, we've seen, great blue herons around here and they're happy to pick off the mosquito fish of which there are plenty for them to do so. But we've had this koi in there for several years and haven't had any issues with predation of them.
Do you feed them?
We don't, no. In a big body of water like this, they eat algae and they're very happy with just that. No problem there. I've got a koi pond in my garden much smaller than this and although we do feed them, we did not for years, and they were fine on a pond about a tenth this size. More koi than are in here and they have plenty to eat.
Oh, thank you thank you very much.